Showing posts with label Card a Day Blog. Show all posts

Tuesday, June 18, 2013

Just Because you brighten my day! - Sketch #8

Today I am sharing this card over on the Card A Day Blog as well. :)

I used this weeks sketch from over at Atlantic Hearts Sketch Challenge blog.

That's it for my shout outs. LOL I'd love for you to go back and check out the links to these two great blogs after you check out my card. ;)

The past few months I have had a very rough time personally on many fronts which I won't go into here as this is my happy place! :) My dear sweet neighbour and Great-Aunt in-law and Great Uncle in-law who are in their late 80's have been an absolute God send in helping me cope with it all. They are always out in the yard as soon as they see the kids and I out with smiles on their faces and a listening ear. I absolutely adore them! Last week was particularly troublesome and on Sunday I was greeted with a fresh loaf of brown bread that she made me "Just Because". They are truly a blessing to have in my life.

I decided to make a card for them "Just Because" since well, I don't bake but I DO make cards. LOL

Here's the card I made for them.
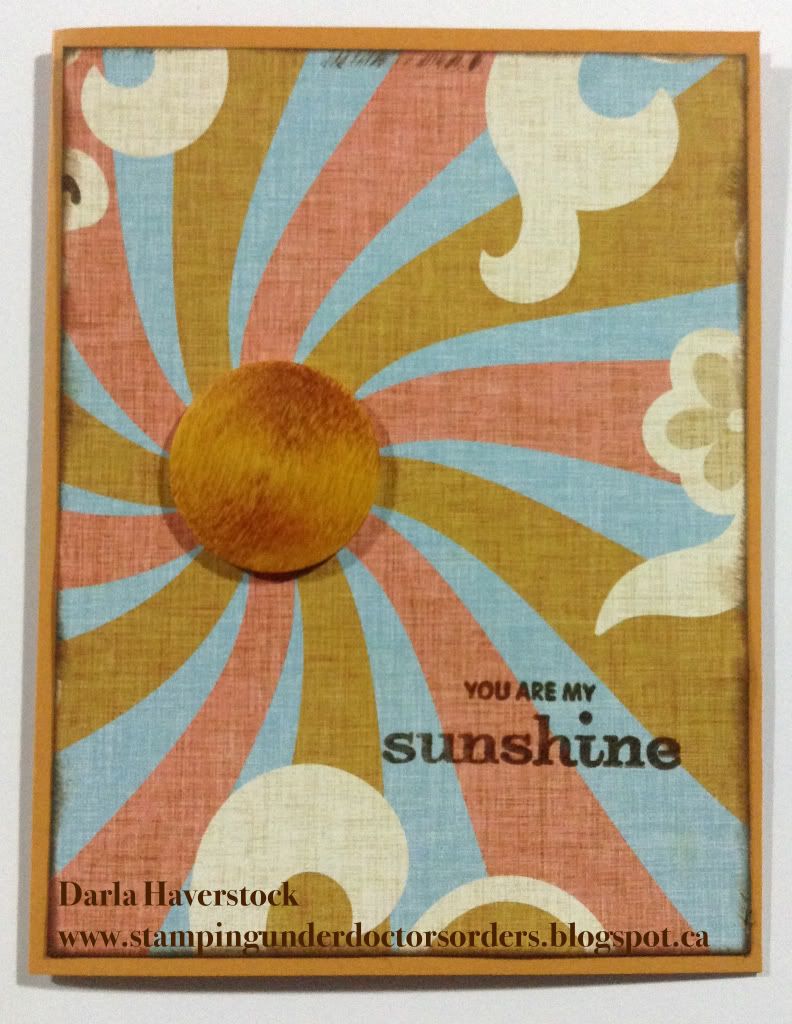

The card base is Goldrush cardstock and the patterned paper is Surf's Up. I used a wooden badge button inked with honey ink (it more closely matches the goldrush on the wooden badge button due to the colouring of the wood). I stamped the sentiment from D1511 Kick Back. with chocolate pigment ink and embossed it with clear embossing powder which is a great solution for embossing in all different colours without owning a million different embossing powders. 

Hope you enjoyed my card and make sure you check out the rest of the Design Teams creations using this sketch when they are all posted on the Atlantic Hearts Sketch |Challenge blog tomorrow morning.  If you wander over to Card A Day Blog tomorrow as well you'll find another great "Just Because" card from my good friend Lucy.


Tuesday, May 14, 2013

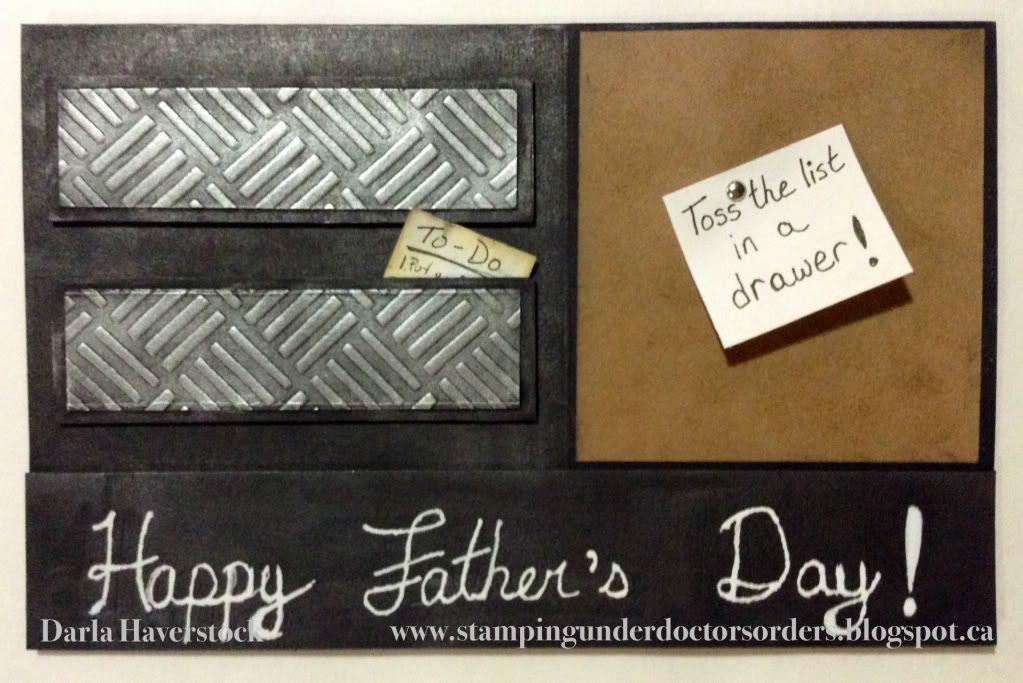
Father’s Day Card

I have this fun card on the Card a Day Blog today.

My husband and my Dad are both very handy and spend lots of time building things or fixing things for people (including me). Their to-do lists often get very very long and both are kind hearted enough to put their to-do lists before themselves (most of the time).

I decided to use the concept of putting away the to-do list as the starting point, added in the current sketch for this week from my new co-hosted sketch challenge blog Atlantic Hearts Sketch Challenge (hint hint wink wink… go check it out!!) and voila!


Now, as much as I’d love to show you the inside of this card I can’t… for 2 reasons…
  1. My husband and my Dad both read my blog and although I’m not sure who’s card this will be I want at least part of it to be a surprise
  2. It’s not finished yet.. sssshhhhhh…. I have big BIG plans for it though and I promise to share it with you again after I give it to them.
Winking smile

DIRECTIONS:

This card is actually a full letter sized sheet of paper (8.5” x 11”) folded in half so it’s a large card.
The bottom piece is 1.25” x 8.5” and is supposed to be the workbench in the garage. The corkboard piece which is really just a piece of Kraft cardstock that I sponged some Desert Sand ink on and distressed the edges with Chocolate a little bit is 3.5” x 3.75”. The drawers are 1.25” x 4.25” and the raised panel on the drawers are 1” x 4”.

I used one of my home made embossing folders to emboss the drawer panels.
*I make my home made embossing folders 5 different ways but this particular one is a cut from the Paper Lace 2 cricut cartridge and is cut out of stencil plastic. To use this type I just use the same sandwich as you would use to emboss a spellbinder die plus an extra piece of thick cardstock for a shim.
I brushed all of the black cardstock with some Gunmetal and Pewter metallic rub-ons (it's like a wax paste and s awesome for this type of project). I then took my silver Encore ink pad and lightly brushed it directly on the drawer fronts to ink the raised embossing.

I made a quick to-do list (which by the way is an actual to-do list here of my husbands that I re-wrote small and then chopped most of it off to make it fit behind the drawer). My post it note is just a scrap of white I had laying on my desk and my thumb tack is a tiny silver brad.

They don’t make sentiments this large for cards and I didn’t feel like piecing all the individual letters to spell it out. I couldn’t print it since it’s black cardstock and you can’t print white (unless you have a very high end printing company printer that actually has white ink in it). All this to tell you I hand wrote all the sentiments for this one. hahaha

Tuesday, April 16, 2013

Mother's Day - Relax

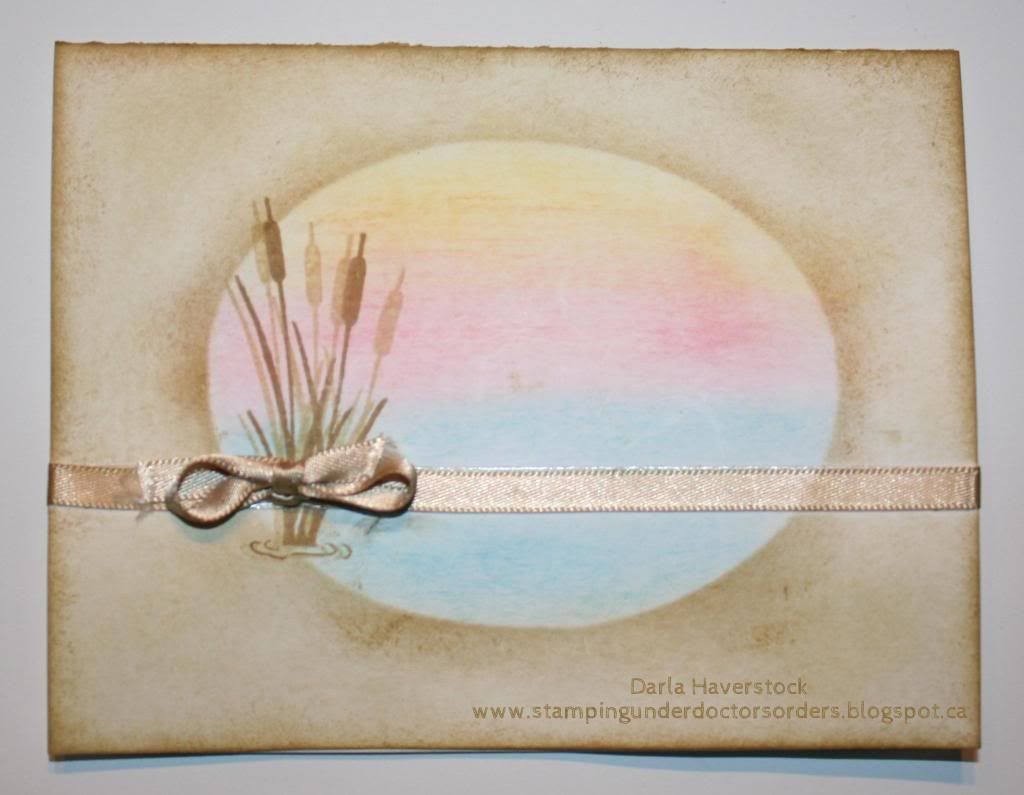
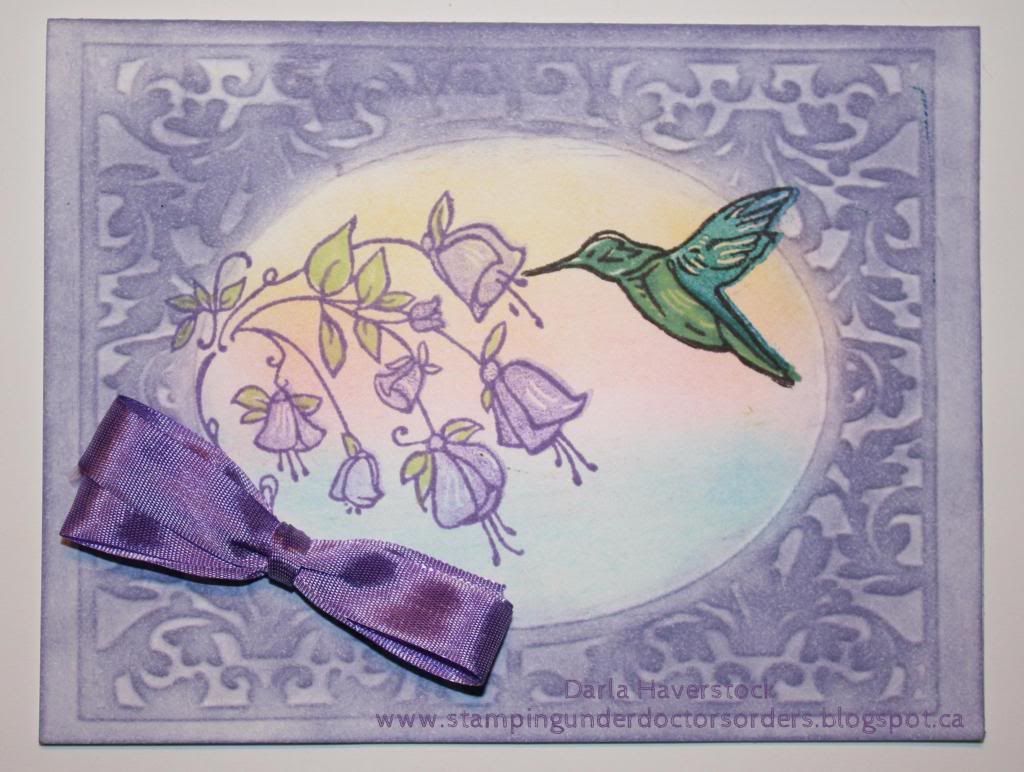
I have 2 cards for you today which I am also sharing on the Card A Day Blog.

I can't tell you which card is for who (mother, step-mother or mother-in-law) as they all read my blog and I want it to be a "little" bit of a surprise at least. ;)

I used a sketch by Michelle Stewart for these cards. Keep an eye out for something exciting along these lines being announced in the next week or so.


Card 1:
I can honestly say I am still totally undecided as to whether or not a sentiment will go on the front of this or not. I plan to say "Relax..." and then inside "...you deserve it! Happy Mother's Day!" but not sure if I might just put the whole thing on the inside as I kind of like the front of this one as it is and think the sentiment might actually take away from it.... what do you think? I think I'm just going through a phase of no sentiment cards or something as I can honestly say I have not stamped a sentiment on a card front (with the exception of some designs I was doing of Michelle's from our joint card class) in well over a month.

This is a one layer card meaning it is just all done directly on the card base so nothing is glued on or taped on at all (other than the ribbon of course).
I cut an oval using the cricut (both Art Philosophy and Artiste have them as well as many other cartridges) and used it to mask the card off. With the outer part masked off I used the watercolour pencils and put the sunny yellow, bubblegum and crystal blue down and wet with a babywipe (my new favourite technique I came across by accident... more about that in a post later on this week). Then I used the oval piece to cover over my sky line and sponge Bamboo and Desert Sand around the edge of the oval, the edges of the card and then lightly around in between. 
I used a stamp from Gina K. Designs by Theresa Momber called "Life is Good" stamped in desert san and then a few times in bamboo as well. I added a piece of ribbon I had a whole bunch of in my stash.

Card 2:
Much the same as the first being a 1 layer card, and again... no sentiment on the front. ;)


This time I cut a frame out of stencil plastic from the Fancy Frames cartridge and used my eBosser with the silicone mat to emboss it into the card front. I brushed over the embossed areas with my gypsy stamp pad. Instead of the watercolour pencils I decided to sponge the colour on for this one using buttercup, blush and sky. I used a gypsy alcohol marker to colour some color ready seam binding. The stamp set I used is a retired set C1389 So Sweet. I stamped with gypsy for the flower outlines, gypsy in second generation for the solid parts of the flowers. I used lagoon and Juniper for the hummingbird, I also used my Pear alcohol marker to colour in the leaves.


Hope you enjoyed my cards.
Products Used:

Monday, March 25, 2013

Thinking of you

I have this card over on the Card A Day Blog today. The theme this week on the blog is "Thinking of you". Unfortunately I have had to make one of these very recently as a very good friend and mentor to me has recently been diagnosed with breast cancer. She hadn't met with the surgeon yet when I made this card for her although she has now and goes for her surgery April 4. All positive thoughts, prayers etc would be very much appreciated. 


The person I made this for is like a mother to me and is the person that is most responsible for my love of all things crafty. She babysat me after school a couple days a week and we used to pick a craft to explore every month (if we really liked it we explored it longer). We did things like origiami, flower pressing, silk screening, making our own stamps from everything  from shoe insoles to erasers (you can see a wedding invitations I made with a stamp I made from an eraser using the technique I learned with her when I was about 10 years old or so here). We are both very similar in that we like to come up with new techniques, perfect it and then move on to the next one. I still enjoy going out to play in her art studio and she enjoys coming to mine now too. 

I also brought out my beloved cuttlebug for her (since I have upgraded to the eBosser) at the same time as this card I made for her which I made sure I used embossing on to show her what she could do with the cuttlebug. She does LOTS of dry embossing herself but does it all by hand with a stylus so I really think she will love this new to her tool. 

The embossing folder I used is one of the new 3D ones from spellbinders and I have to say I am just loving these and can't get enough of them!! This card only used a small section of this folder.

Come back tomorrow to see a Tinkerbell birthday card I made using this same embossing folder... I promise I'll even show you the entire embossing folder on that one. ;)

I used the Close To My Heart watercolour pencils on the embossing to make it pop and one of the clear buttons which you can find in the While Supplies Last section for the center of the large flower. A little bit of glitz glitter gel on the butterfly wings and voila!

Products Used:

Monday, March 18, 2013

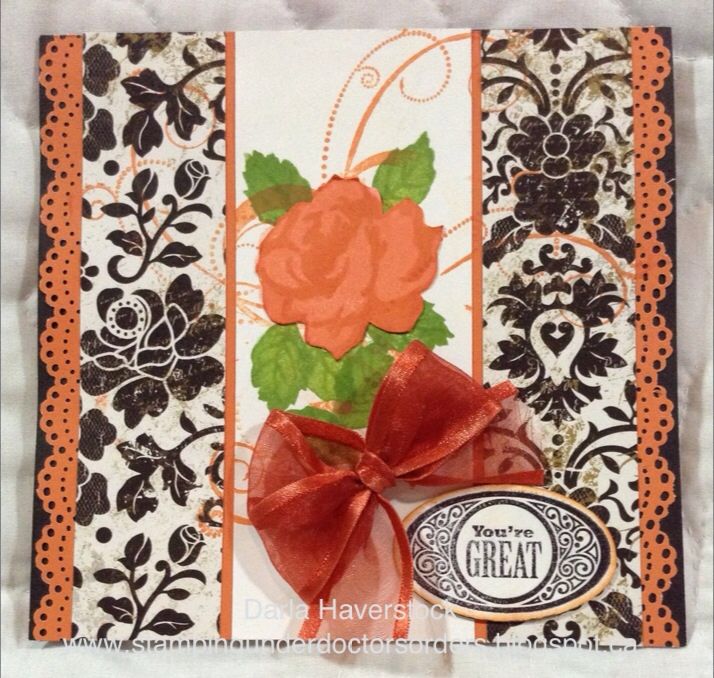
You're GREAT

I have another card over at the Card a Day Blog today. Head on over there to see some fantastic inspiration posted EVERY day and also go enter a card in the monthly contest over there.


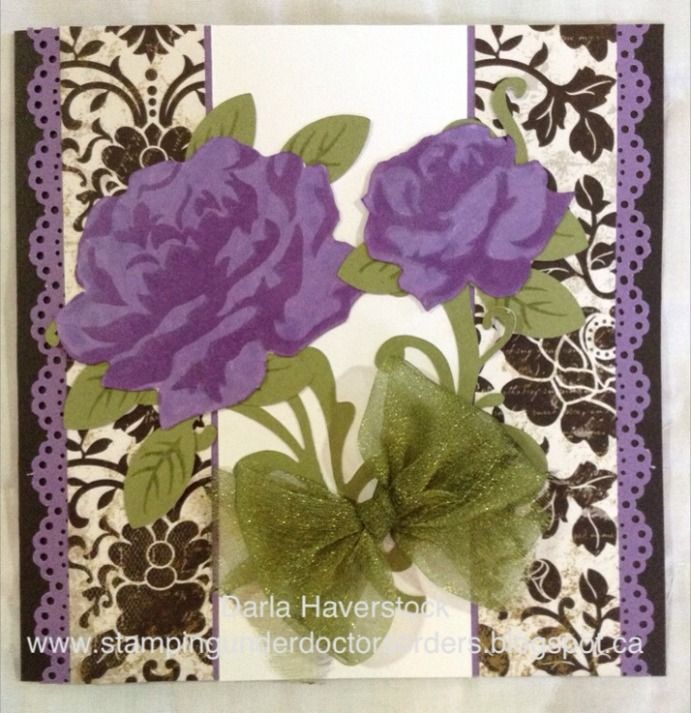
I did this card in sunset cardstock and ink because orange is the favourite colour of a friend of mine who this card was for to celebrate her new job. The patterned paper is the For Always paper pack which I am in LOVE with. The flower and leaves is from the Stamp of the Month set this month "Floral Happiness", the swirls are from "Love Life" and the You're GREAT sentiment is from "Casual Expressions". The ribbon is from my stash and the edges of the sunset are punched with a lace doily Martha Stewart punch which could easily be substituted with a border from either Art Philosophy or Artiste cricut cartridges. 

I wasn't 100% happy with it for anyone other than someone who likes orange mostly because orange is NOT my favourite colour. :)

so.... I re worked the card with Gypsy and it will be a birthday card for the Spring Fling card class this Saturday March 23rd. There are still a few spots left if you're interested let me know. 


PRODUCTS USED:

Tuesday, February 19, 2013

Wedding with that handmade touch

I am sharing a card for the Card a Day Blog today.

I made these for a friends wedding.

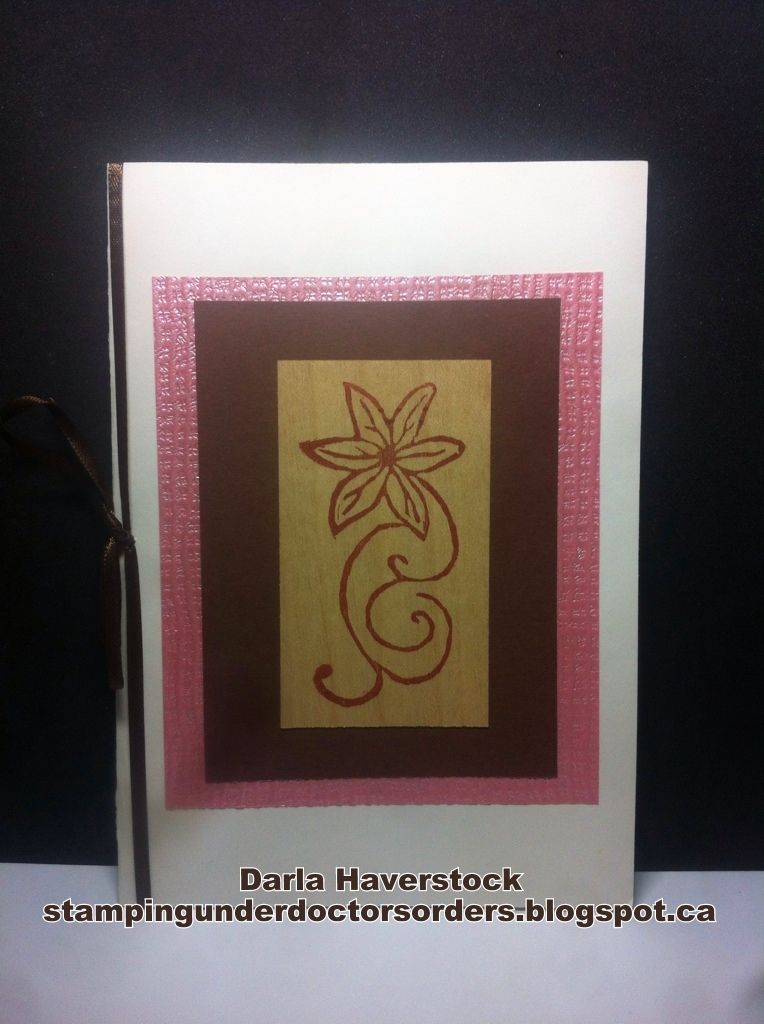
The focal image is a stamp that I hand made for the bride using a sketched image of a lily she liked. I transferred it onto an eraser and used a lino block carving tool to carve the stamp out of the eraser. This really makes her invites completely unique as she is guaranteed that no one will ever have the same thing unless she lends them the stamp that was made. 


The image was stamped onto a wood veneer business card which are available in packs of 200 of so from Lee Valley Tools for less than $5. Matted with chocolate brown paper and then onto some textured pink metallic paper (chocolate and pink were her wedding colours).
We also used the same image in pale pink on white and had magnets made with the bride and grooms names in chocolate and their wedding date on them. We were fortunate enough that the brides sister works for a printing company so she got all the magnets printed in a coated glossy so we didn't actually have to hand stamp those or anything.. just laid it all out once and scanned it in for her to print. 
I love adding texture and other materials like wood and things to a card. I find it really gives them that extra little something and makes them look truly unique and handmade yet still looking professionally done at the same time. 
I'd love to hear what you have added onto your cards or other projects that were a bit outside the box!  Who knows... I just might need to try it out. ;)

Wednesday, February 6, 2013

Beach wedding invite

I have this beach themed wedding invites over on the Card a Day Blog today.


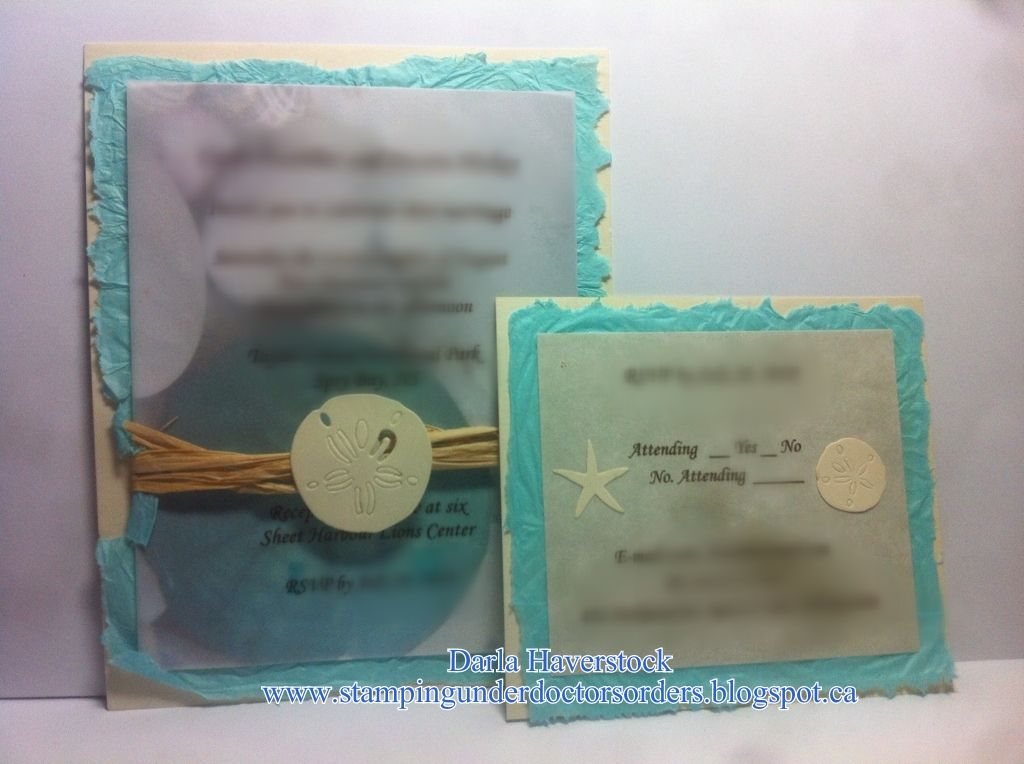
I did these invitations for a friend of mine She really wanted the aqua mulberry paper but of course couldn't find any that we could get here in time so I made my own version for her which she loved. We took tissue paper and crumpled it up a few times and then used a spray adhesive to stick 2 pieces together. I then painted lines of water where I wanted to tear it to make it easier to keep to the dimensions I needed and tore it apart. She had a picture of some shells and sea urchin in a similar colour palette that she wanted to use so I printed the picture off on some cardstock and then printed her text on some vellum to layer on top. Finished it off with some raffia and a sand dollar cuttlebug die cut.

The RSVP was done with the same tissue paper layer and then just printed the text on some nice paper. Added a couple more die cuts and voila!

Tuesday, January 29, 2013

Hope you see your rainbow soon

Today I have a little get well card to over on the Card a Day Blog to share here with you.
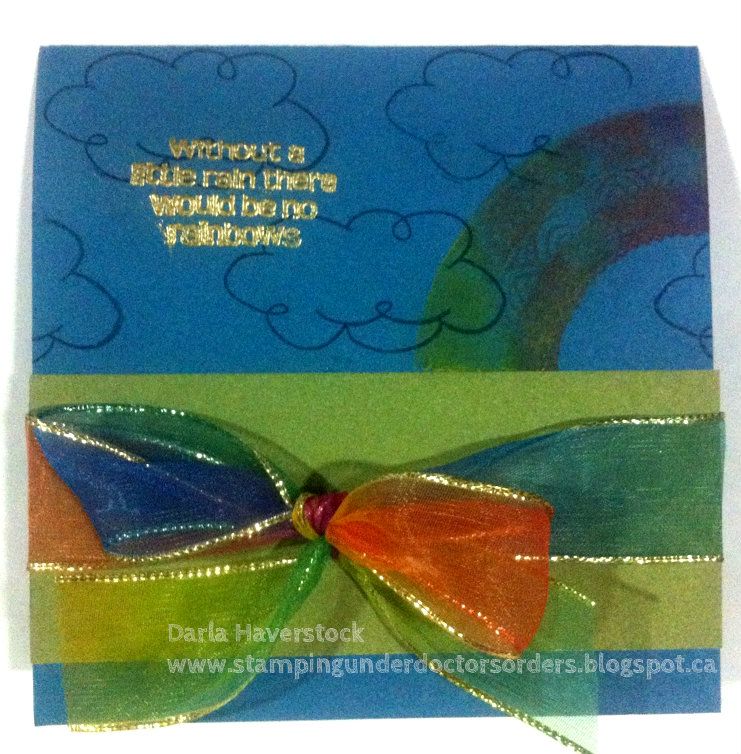
The sentiment reads "Without a little rain there would be no rainbows". I could not for the life of me get a picture that showed the sentiment clearly... sorry.

I used Pacifica cardstock for my base (it's a 4" square card). The green strip is Olive cardstock and the ribbon is an Offray brand ribbon that I've had in my stash for a very long time but I think goes absolutely perfect with this card. All of the stamps are from the "A Rainbow" stamp set which is an awesome stamp set for just $6.95!! The rainbow is stamped using a rainbow pigment inkpad I happen to have but our new pigment inks would have worked wonderfully for this too (I realized after I had already inked up my stamp of course).


This could also easily be a pick me up card or a don't lose hope card depending on what you write on the inside.I haven't actually written on the inside of this one yet as I am sticking this one in my stash for when I need it, however a few suggestions would be:

...Hoping you see your rainbow soon.

...Sending an umbrella to make the rain more bearable.

...Chasing the clouds away.

...You may as well dance in the rain while it's here

or I'm sure you could probably come up with something even better!! :)

Please go over to the Card a Day Blog and check out all of the other wonderful cards by the other designers there as well.

Products Used:

Wednesday, January 16, 2013

Thank You

Today I have a card over at the Card A Day blog.

I had every intention to share a detailed, intricate and time consuming card for my post, however when I saw the theme "Thank You" I knew I just had to share this instead.

Many people in my life (past and present) have battled with cancer. Anyone that has ever been around anyone battling cancer knows that you always feel so helpless whether you are the one fighting, a friend of or family of.... I decided I would do what I knew I "could" do. Our cancer center has what is called a "Sunshine Room". This is a place where cancer patients and caregivers of those patients can go to relax, receive complementary therapies and chat with counsellors or other various services offered. You can read more about it here. One of the things a few of my friends that battled often asked for were thank you cards as they didn't have the energy/money to go and get thank you cards for the many people who often step in to help in some small or large way for them. I thought it would be nice to make a whole pile of simple thank you cards and give them to the Sunshine Room for patients and caregivers to take for their use as needed/wanted.

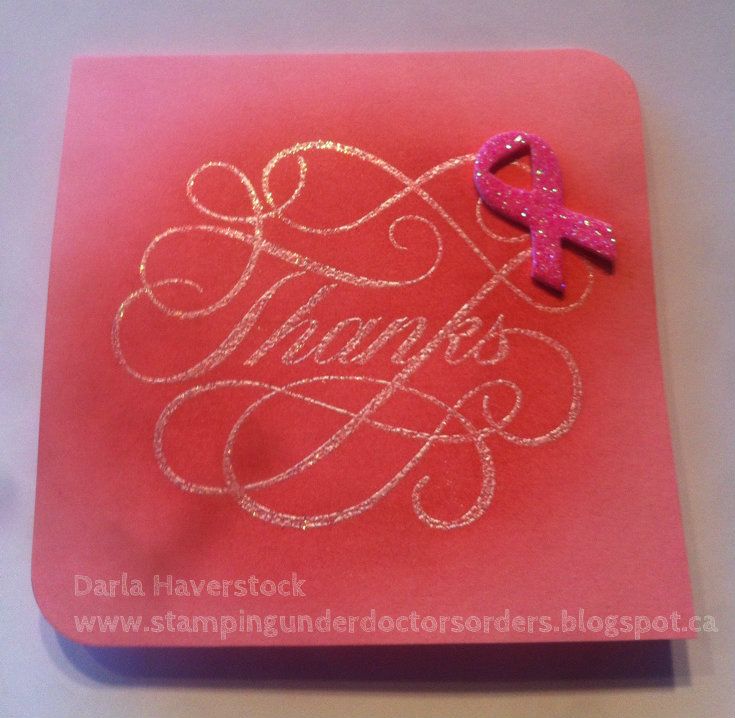
Here is the first of many....


The picture does not do this card justice. The "Thanks" stamp is stamped in versamark and embossed with Ranger "Bridal" embossing tinsel so it is very glittery. I used my cotton candy ink and a sponge dauber to go over the embossed area to really make it stand out. I picked up hundreds of the little pink ribbons which are craft foam covered in glitter and will be making my own in other colours for the other various cancer colours. I finished it off by simply rounding 2 of the corners to make is just a little bit different. The card itself measures 3 1/2" square so it's not very big and won't require a huge message to be written inside to fill the space. 

I hope you like my card today, and maybe even feel so inclined to make a few yourself as most cancer centers will accept cards. 


floating share

  
Get widget