Showing posts with label card. Show all posts

Wednesday, September 18, 2013

Celebrate Sketch 21

I have to say that I am very happy with how my card turned out for this sketch! I did have a bit of help though as there was a card class I took at Carousel Rubber Stamps back in 2010 that I absolutely loved! I wanted to recreate it but of course it used a punch I didn't own (and couldn't find), a stamp that by the time I decided I wanted it was no longer available and expensive shimmery paper..... You can see the original from the class here. Of course I was going through all the sketches Michelle had given me to digitize and came across this one and nearly fell off my chair as if you look at it sideways was perfect.... I guess it was time to try to create the same stunning effect using what I had on hand. The Artbooking cartridge and Create-a-shade Pearl Paint made this extremely easy and I'm really glad I waited so long as I actually like this one to the original as the Sentiment stand out more, and I didn't have to heat emboss and fussy cut out (by hand) the butterfly. Yay!


This first one show the colours the best and more true with the Celebrate sentiment but I adjusted the colours a bit in the Remember sentiment one so you could see the shimmer that the pearl paint mixture adds better. 


I used White Daisy card base and for the top rectangle mat. The rest is all Colonial White that has been sprayed with a mixture of water and Pearl Paint. I am in LOVE with Pearl Paint for many techniques but this is by far my favourite!. :) I also sprayed some of the pearl paint mixture on one of my teflon craft mats and then stamped a swirl from Love Life in it and onto the top white piece randomly to add a bit of shimmer there as well and to provide some flight paths for the butterfly. I don't think you'll be able to see that in the photo though so you'll just have to trust me on that one. 

All the pieces (border, Sentiment and Butterfly were cut from the new Artbooking Cricut Cartridge. 

The ribbon is just some sheer ribbon from my stash that I got at Michaels when it was on sale.

Now go check out all the rest of the Design Teams wonderful creations this week (as well as the Top 3 from last week) HERE.

Also, if you'd like to play along with this weeks sketch you can find it and the link up for it HERE.

Products Used:

Wednesday, September 11, 2013

Sketch 20 Peace

I actually intended to share a different card with you for this sketch but it never got finished as it's been another crazy week in our house. Keep an eye out though as I really want to make the other card I had in mind so I'm sure you will see it show up here eventually.

I had also made this card which is a variation on a card I had made a year or so ago at a local craft store that is now close unfortunately. I switched out some of the colouring and what I used for the colouring as well as popping a few squares up with dimensional adhesive.


I am on a search to find the name of this stamp for you but it is one of my older non-CTMH wooden ones and the name of it has worn off so if any of you recognize it by all means please let me know the name in the comments. I will find it though as I am determined and will update the post when I do. :)

Now head on over to see the rest of the design teams creations this week and check to see if you made top 3 or not by clicking HERE.

You can also go directly to this weeks sketch and link up your own entry by clicking HERE.


Wednesday, September 4, 2013

Lovely Sketch 19

This weeks sketch over at Atlantic Hearts Sketch Challenge was provided by one of our fabulous Design Team members Carrie Wright.

I decided to stick with the heart shape she used in her sketch and with a little help from some white embossing powder, Laughing Lola Paper and D1571 Sweet & Lovely which is one of the stamp sets that comes in the Artbooking Cricut Collection Bundle I came up with this card.


The strip down the left is just the zip strip on this paper which I just cut my piece for my card from that edge of the paper to include the zip strip.

Now please head on over to Atlantic Hearts Challenge Blog to see what the rest of the Design Team came up with this week as well as the Top 3 from last week by clicking HERE.

You can enter this weeks challenge and see the original sketch HERE.

Saturday, August 31, 2013

It's Called Artbooking for a Reason


As many of you know, Close to My Heart has just released a brand, new Cricut cartridge: Artbooking!!! It's nothing short of fantastic!!! Oh the things you will be creating with this cartridge - we don't even know where to begin! So, we decided to show you some of the creations WE have made using this amazing, versatile cartridge It's not just for scrapbookers you know. There are 700 images with a ton of coordinating stamps.

If you don't already have a Consultant that you are currently working with, please contact one of the Consultants in our hop with any questions you have!

In this hop, you will see projects featuring this versatile cartridges from many talented crafty ladies! Enjoy our blog hop! 

If you have just hopped onto my blog, please start at the beginning at Lucy's blog – Love 2 Create. If you came from Lucy's blog – Love 2 Create then you are in the right place!

Today I decided to show you that although Artbooking has wonderful scrapbooking layouts all pre-designed for you that you just pick your colours and start cutting or mix and match to make your own, mini-books and all things scrapbooking... it is still fabulous for cards!

I am loving the page laces for card backgrounds like I used in my Halloween card that I made HERE.

This time however, I wanted to show you that with just a few scrap pieces laying on my desk I was able to add a couple cuts from the cartridge and make a card that I am very happy with. 


I used the stamp set Country-Born D1543 stamped in cocoa on colonial white and matted it with a piece of Babycakes B&T paper. I coloured the image with alcohol markers as well as sponged a bit of new england ivy on the bottom and some cocoa and cashmere around the edges. Then I grabbed some scrap pieces of ruby and honey and distressed the edges with cocoa. 

I cut the border image from page 72 at 6" from New england ivy and the leaves from both autumn terracotta and honey. I crumpled and sanded the leaves and then inked directly with the pigment inks and smooshed it around with my fingers until I was happy with the end result (I used cocoa, goldrush, autumn terracotta, cashmere and new england ivy for this). The image panel is raised up on foam tape as well as the swirl is raised up in some parts and stuck flat in others to give it more dimension.

Oh and I should have taken a photo of the inside... but the sentiment inside says "I love you a bushel and a peck and a hug around the neck".

This will be going in my pile of cards to send to the Deployed Canadian Military for them to use to send home. I know I would love a card like this from my hubby while he is deployed, so I'm sure someone else will too. :) If you'd like more info on how to go about sending cards to our Deployed Canadian Military please check out the Facebook page I started HERE or contact me and I can send you the info.

Your next stop on our Artbooking blog hop is Jennifer of 4 Hearts Scrapbooking.

Here is the complete lineup in case you get lost along the way:
  1. Lucy ~ Love 2 Create
  2. Darla ~ Crafting is Contagious 
  3. Jennifer~ 4 Hearts Scrapbooking
  4. Wendy Kessler ~ My Scrapbooking Blog
  5. Janna Gray ~ The Creative Princess
Thanks for hopping along with us - we hope we were able to inspire you.

Wednesday, August 14, 2013

Happy Birthday - Sketch 16

I had to make a card for my little cousins 1st birthday... (Happy Birthday sweet girl!) on the weekend and as usual I fell back on the sketch for Atlantic Hearts as my starting off point. Of course after I finished the card I remembered I just got the cutest stamp set from the new idea book out of Jeanette's Archive so I pulled it out and made a second card with it.

Here's card #1

Here's card # 2

I honestly can't tell you which is my favourite as I keep going back and forth between them. They both use the new Babycakes paper with chocolate cardstock on colonial white card bases. They also both use the Babycakes Complements for the "ribbon". Oh and yes, they really are the same colour in real life but when I tried to correct the colour in the photo of the giraffe one it turned the grey background green when I adjusted the colour for the chocolate so I gave up and left the patterned paper as close as possible to the correct colour and I'll let you imagine the chocolate colour like you see on the teddy bear card on it instead of the darker almost cocoa colour that you see in the photo.

The giraffe card I simply stamped the sentiment from D1502 - Look Who's on the canvas Babycakes complements using the chocolate pigment ink from the basics assortment.

The teddy bear card everything is stamped with the pigment ink and then I used alcohol markers to colour in the bow, present and hat (by the way the present and hat are separate stamps in the set so your bear doesn't have to be birthday he can just be a bear with a bow on him). I used a blender pen with the chocolate ink to colour in the bear nice and light.

Now head on over to the Atlantic Hearts Sketch Challenge blog to see the all the awesome creations by our wonderful Design Team and to see who got Top 3 from last weeks sketch HERE.

Once you've been inspired I'd love to see you get brave and link up your own take on this weeks sketch HERE.


Products Used Today:

Wednesday, July 31, 2013

Your friendship is like coffee

My card for you today uses Sketch # 14 from Atlantic Hearts Sketch Challenge.

 In case you were wondering what happened to me last week I was away on vacation and although I had a card made and had taken pictures of it to post for you while I was away the files went corrupt on me and I couldn't get them off of my camera to share with you and of course I didn't bring my card with me to re-photograph it. The card has vanished into the abyss which is my craft room and when it appears again I will get it photographed and posted for you. :)

 This is actually not the original card I had made for this weeks sketch as my original card is lost with last weeks card somewhere (yes, I seriously need to re-organize... or actually right now the problem is that I re-organized but can't remember where I re-organized everything to). The card I have for you today is one I made for a new but dear friend to me who listens to my complaining and is my shoulder to lean on on a daily basis. She picks up my slack for me when life throws lemons at me and I just haven't gotten around to making lemonade with them yet. Although I have a feeling it will be quite some time before we have a childless coffee date with hubby being away I made this card for her. Thanks Michelle!

I used the new stamp coming in the Autumn/Winter book which goes live tomorrow called Geometric Backgrounds to make my background. Sooooo simple and I just love the effect. I was going for old fashioned tablecloth here and I think it works. Although Michelle's favourite colour is blue I just couldn't bring myself to do this in anything other than red as that's what stands out as the old fashioned checkered cloth to me. I stamped the pot and cup from Cup of Cheer, coloured them with alcohol markers and fussy cut them out minus the steam. The sentiment was stamped from the same stamp set on the white layer as was the steam. the card base and the strip across is Ruby Cardstock.

I hope you enjoyed my card today and will go over HERE to see the rest of the Design Teams creations this week for Atlantic Hearts Sketch Challenge # 14 as well as the Top 3 from Sketch 13. 

If you'd like to see this weeks sketch and enter yourself please check that out HERE.

Products Used:


Wednesday, July 10, 2013

My take on Sketch # 11

I have 2 cards for your today.

The first is my own take on this weeks sketch. I just can't help myself, no matter what when I see horizontal stripes I think sky line.

This card uses the watercolour pencils to colour a white daisy cardstock panel with the July Stamp Of The Month (available for just $5 with any purchase of $50 or more). I LOVE this stamp set! I then mounted this piece on a kraft cardstock base.

Wednesday, July 3, 2013

Sketch 10

Here is my card for this weeks sketch from Atlantic Hearts Sketch Challenge. We'd love to have you play along with us! You can find links to the rest of the design team creations as well as the link for this weeks sketch at the bottom of this post.

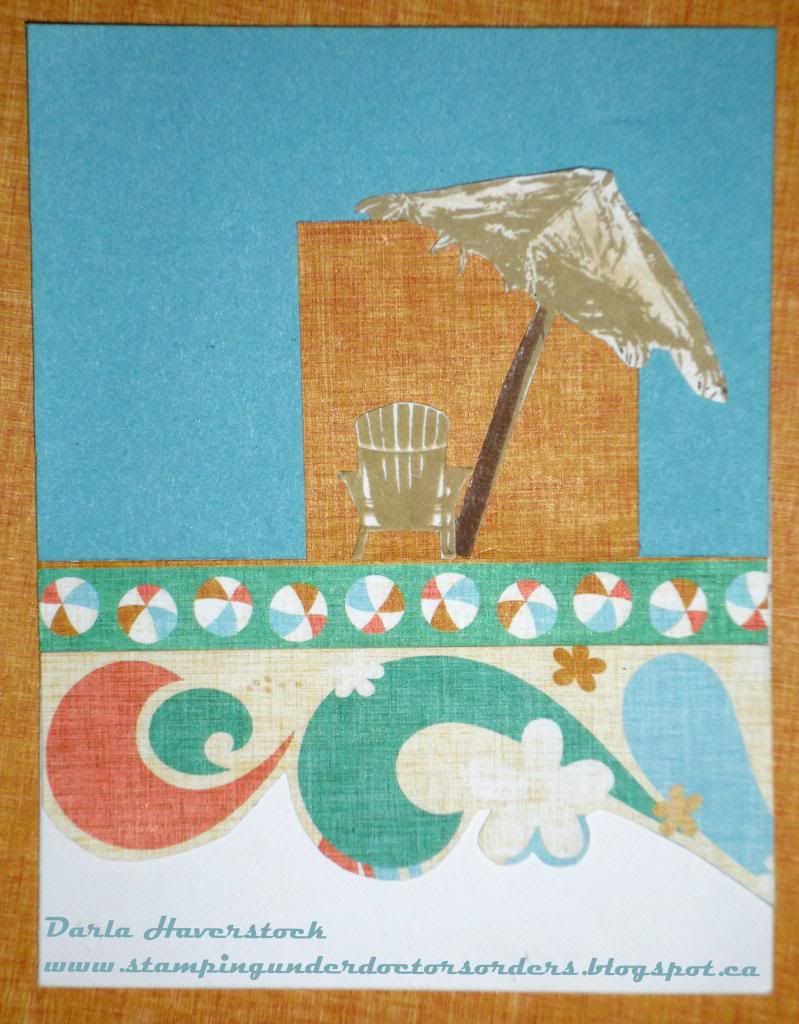
I used a white daisy card base here with crystal blue on the top half. The stamped images are from D1511 Kick Back and are stamped in Chocolate and Cashmere. The images are fussy cut out and layered on a piece of patterned paper from the Surf's Up collection. I used the zip strip from the same paper (the part with the beach balls) and the other side of the same paper I cut the "waves" out of and stuck below.


To see the Design Team creations for this week go HERE.

To see this weeks sketch and the entries so far (and to enter your own) go HERE


Products Used:

Wednesday, June 26, 2013

Thank You - Sketch #9

Today I have a card using this weeks sketch from Atlantic Hearts Sketch Challenge for you (links to this weeks sketch and Design Teams creations for you at the end of this post, definitely check them both out as there are some fantastic creations. We'd love to see you play along with us too!).

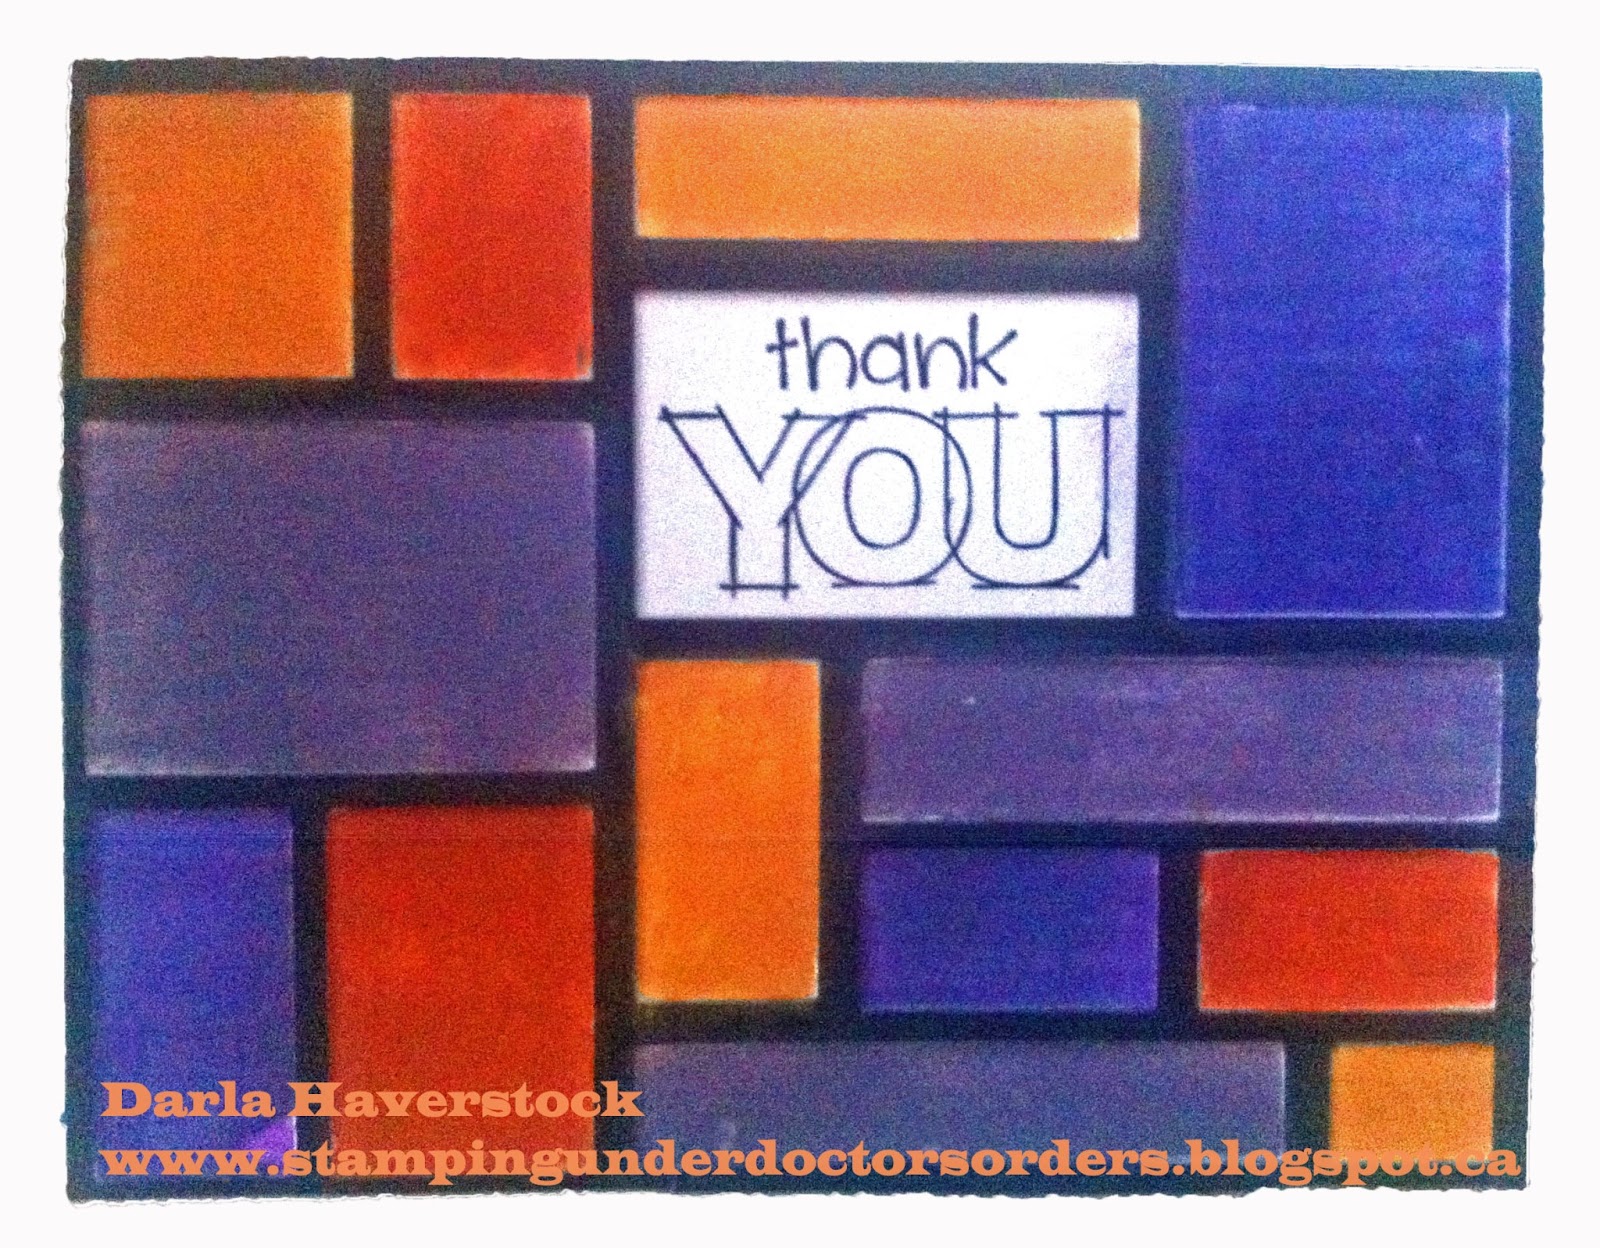
I created this Thank You card using the fantastic $2.95 promotional stamp "A True Thank You" with proceeds going to relief for Oklahoma.

I cut all the rectangles out of the black cardstock creating my frame overlay. I then just coloured the card base that showed through with gypsy, smokey plum, autumn terracotta and honey inks. Stamped the Thank You in black and voila!


To see the Design Team creations for this week go HERE.

To see this weeks sketch and the entries so far (and to enter your own) go HERE

Wednesday, June 5, 2013

Celebrate the Magic with Sketch #6

My card for Sketch #6 from Atlantic Hearts Sketch Challenge is a fun one. Great for a kids birthday OR to celebrate going to Close To My Heart convention 2013 in Disney World!! Yay!!

Only 20 more days until Michelle and I board a flight to Florida with fellow consultant Rosalynd. Once there we will meet up with MANY other consultants (I think someone said there were over 2000 at last years convention) and get crafty with the products being released with the Autumn/Winter Idea Book that will come out August 1. Definitely something to celebrate!


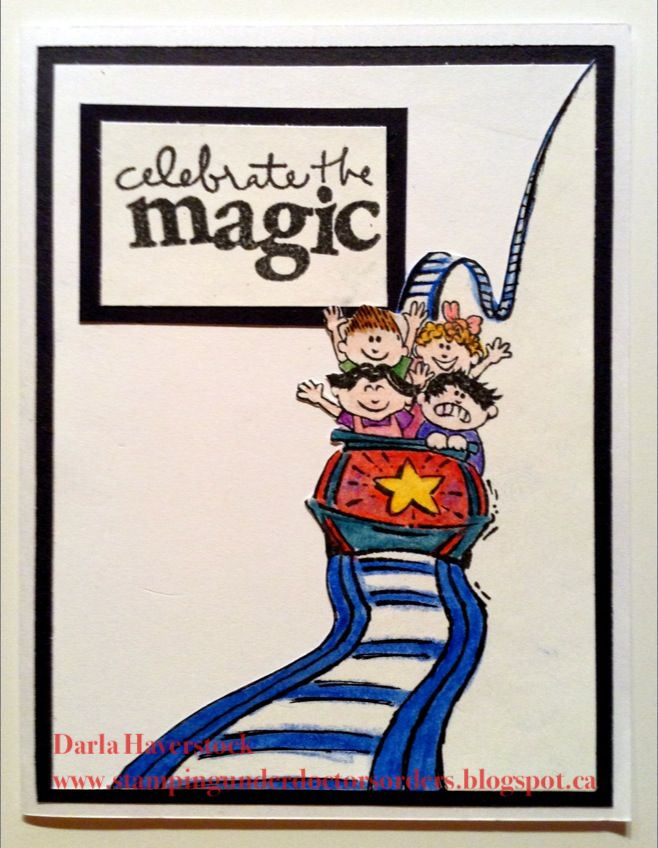
I used a retired stamp set for this card called Magic Adventures D1509. I used my journaling pen to extend the roller coaster track a little bit in front and a bit in back as well (bet you can't even tell where the actual stamped image ends and my hand drawn line begins... and now you're trying to find it just because I said that  haha). I used my watercolour pencils to colour the image and then I hand cut along the sentiment side of the track and car so I could slide my sentiment piece underneath. The picture makes it look black but the mats are actually Outdoor Denim.

I honestly envisioned the sentiment going lower like the sketch but I glued down the whole coaster side before really placing everything to realize it wouldn't fit lower and have a chance to trim some off on the right to allow for it. Oh well. :)

Speaking of celebrations, this months specials are definitely something to celebrate! There are four.. yes four specials this month and technically one of the specials could be broken down into three more.

Check them out and then please head over to the post at Atlantic Hearts Sketch Challenge Blog to see the rest of the Design Teams creations as well as the Top 3 from last weeks sketch ....

1st is a great campaign where for just $2.95 you can grab M1029 - "A True Thank You", a teaser stamp set from the Autumn/Winter idea book and better yet, all the proceeds are being donated to relief efforts for Oklahoma. Check out this great stamp...
2nd is technically three great promotions and also is something that hits very close to home with me. Most of you know that my husband is in the Canadian Navy and has been for the last 16 years, my late father-in-law was in the Canadian Air Force and many other family members serve in both US and Canadian military.
What does this promotion have to do with any of that... well it's 3 great limited edition stamp sets of which Close To My Heart will donate $3 from each B-size My Acrylix® Courage stamp set and $5 from each D-size My Acrylix® Home of the Brave stamp set to the USO, the leading, most recognized military-support and services organization in the United States, or $3 from each B-size My Acrylix® Courage stamp set and $5 from each D-size My Acrylix® Strong and Free stamp set to the Canadian Hero Fund, which supports spouses and children of fallen Canadian military troops by providing post-secondary education in Canada.
B1437 - Courage $9.95
D1576 - Home of the Brave $17.95
D1575 - Strong and Free $17.95


3rd is if you place a $25 order that includes a stamp set, you’ll receive a My Creations® mini banner for free! The mini banner includes 10 chipboard pennants in 4 different shapes with 9 jump rings for hanging.


Last but not least of course is this months Stamp Of The Month set which is just $5 with every $50 order.
A Flowering Bunch - June 2013 SOTM

Now head over to the post at Atlantic Hearts Sketch Challenge Blog to see the rest of the Design Teams creations as well as the Top 3 from last weeks sketch.

Tuesday, March 26, 2013

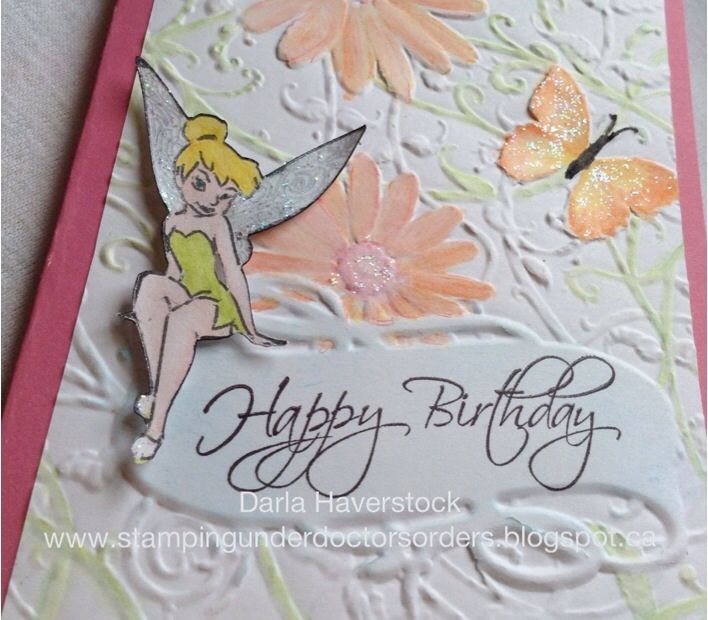
Tinkerbell Happy Birthday

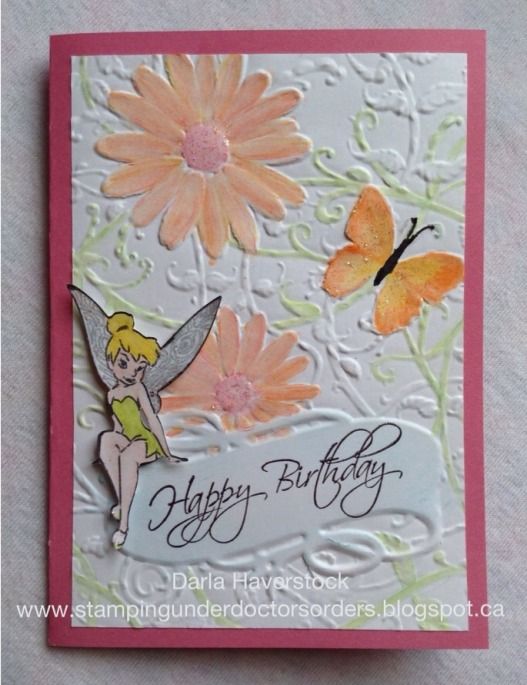
I can't seem to get enough of these new folders so of course I have another card for you today for a girls birthday card using the same folder as I used here . We had a birthday party to go to for my 4 year old cousin that I used to babysit through the day. She is into Tinkerbell of course so....


This one was coloured with the watercolour pencils. Tinkerbell is drawn on the cricut (Tinkerbell & Friends cartridge) using the cricut gel pens (once in silver using the filigree creative feature, again in black using just the image button) and then cut out using the blackout feature, coloured with the watercolour pencils as well and popped up on foam tape. A little glitz glitter gel on the butterfly, flower centers and Tinks' wings and shoes. The sentiment is from For Every Occasion. The card base for this one is Cotton Candy..

A close up to see the dimension..


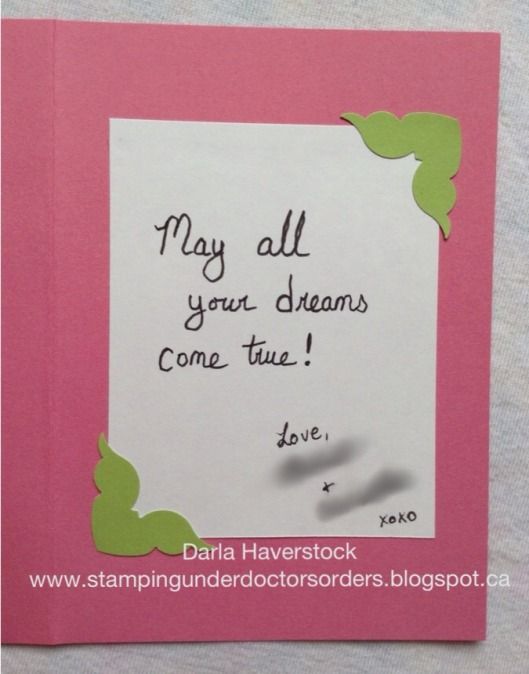
Of course I just have to show you the inside of this one because our Pear cardstock is the perfect colour for Tinkerbell.

Products Used:


Edited to add:

I have a YouTube video on using the markers you can watch here http://youtu.be/nSDE1TdCs8U

The gel pens work the same way. It's just a matter of making sure both the image you choose to draw and the one you choose to cut "cut" in the same spot. 

For tinker bell:

- I loaded my paper in the top right of my mat and pressed load mat. 
- put my silver gel pen in and chose my size (3" for Tink I used on my card)
- set speed and pressure to what is written on the side of the gel pen
- select the image (I used the filigree feature of Tink to get the swirls on her wings) and press cut
- once its done drawing with the silver I pressed load mat again to bring it back to the same starting position
- replaced silver pen with black
- chose the main image (no creative feature) so it would draw all the details (eyes, nose, mouth, etc) 
- press cut
- press load mat again to return to starting position
- take pen out and insert blade
- change speed and pressure to the correct settings for the paper I was using
- choose the blackout feature so it only cuts the outline
- press cut


floating share

  
Get widget