

Welcome to our The Artiste in 3D Blog Hop! There are so many fun features in our Artiste Cricut cartridge that we decided to showcase many of the 3D Objects

In this hop, you will see a variety of projects featuring the 3D Object key of the Artiste but don’t worry, you won’t need special glasses to see them! (But we do hope our projects will “stand out” to you.)
If you have just hopped onto my blog, please start at the beginning at Lucy's blog – Love 2 Create. If that's where you came from then you are in the right place!
For my project today I wanted to show how you could make some very quick but beautiful home decor.
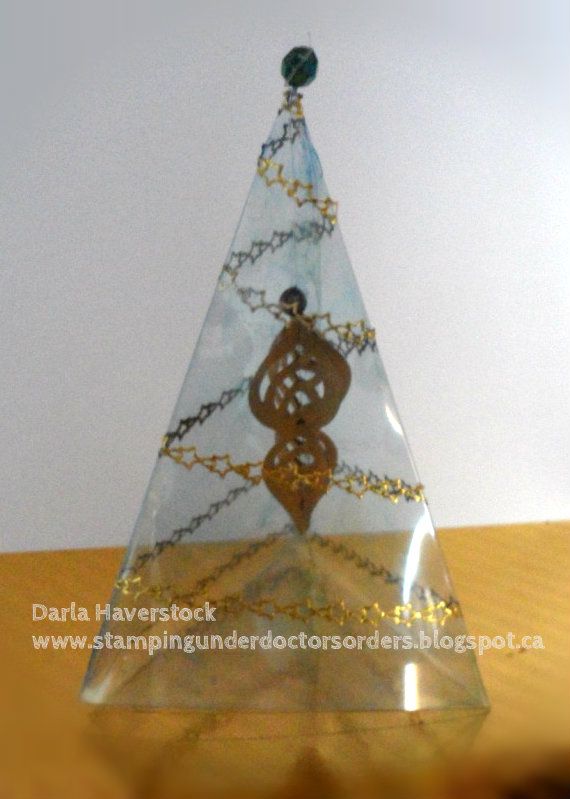
The garland is just some outline stickers I've had laying around for years. This could easily be substituted with absolutely anything including a nice stitch stamp or border stamp in gold staz-on, glitter glitz, viva decor pen.... you get the idea.
I used a needle to thread the other end of the cord up through a gold bead and then up through the top of the tree. I used another larger green bead on top and once I had my ornament hanging at the height I wanted I tied it off to this bead. I think I will actually use a gold bead on the top too for the next one. You may also notice a slight green tint to the plastic... there is a reason for that.. LOL I tried to photograph this except the clear plastic just did not want to take a nice photo so I grabbed some green alcohol ink and some alcohol and sprayed a mixture of the two into the inside of the tree (without the ornament of course) and wiped it around a bit just to give the plastic a hint of colour so it would photograph.
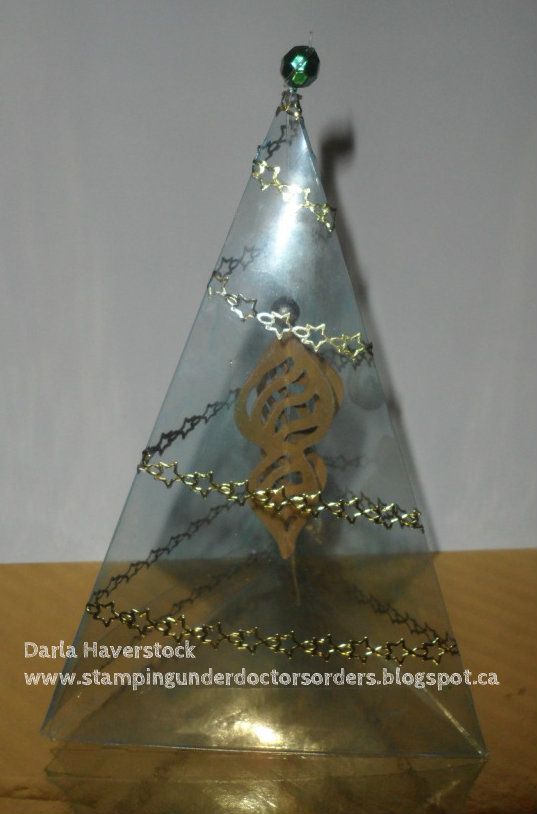
Here's a shot in slightly different lighting:
Products Used:
Your next stop on the Artiste in 3D blog hop is Stephanie - The Quilted Scrapper.
Here is the complete lineup in case you get lost along the way:
- Lucy - Love 2 Create
- Darla - Caution: Crafting is Contagious
- Stephanie - The Quilted Scrapper
- Wendy Kessler - My Scrapbooking Blog
- Laura Wolff - Scrappinsweetie’s Escape
- Kindred Hearts - That Makes Total Cents
- Theodora Stacey - Celebrate Crafts
- Priscilla - Priscilla’s Paperie
- Michelle - My Flights of Fancy
Thanks for hopping along with us - we hope we were able to inspire you to create your own 3D projects with the Artiste.

Thank you Sarah
ReplyDeleteAwesome tree! I was so excited to see this hop... I seriously need ideas for this cart!! Thanks so much :)
ReplyDeleteWhat a great project! I love your clear tree!
ReplyDeleteGreat idea! I think I am going to have to hunt down some acetate. Thanks Darla!
ReplyDeleteI want this cart Sooo Bad... hopefully soon.... Love your Tree - Very inventive... hmmm thinking of scraplifting a bit of it hmmmmm
ReplyDelete--Robin
Awesome tree!
ReplyDeleteLove, love, love this! You always find new things to cut on the Cricut -- TFS :)
ReplyDeleteLucy
http://love2createitall.com
Your project is so pretty....I so need to try my hand at this.
ReplyDeleteLovely project....thanks for sharing.
ReplyDeletevery nice
ReplyDeleteWow! This is gorgeous! So creative!
ReplyDeletevery cool project!
ReplyDeletewhat a neat project!!!
ReplyDeleteBeautiful job. Love it.
ReplyDelete